


")


Festive Nail Designs for Winter, December, and New Year 2025
As the holiday season approaches in December 2025, it’s the perfect time to embrace festive nail art that captures the magic of winter, Christmas, and the upcoming New Year. Whether you’re attending parties, family gatherings, or just wanting to add some cheer to your everyday look, these designs are versatile, fun, and easy to achieve at home.
Based on the images you’ve shared, I’ll break down the inspirations, provide practical tips like removing old nail polish, suggest color combinations, and even include where to buy similar stickers. Let’s dive in and get your nails holiday-ready!
Exploring the Provided Nail Design Inspirations
The images you shared showcase a delightful array of winter-themed nail art, from stickers to full manicures. Here’s a detailed look at each one:
Christmas Nail Sticker Sheets
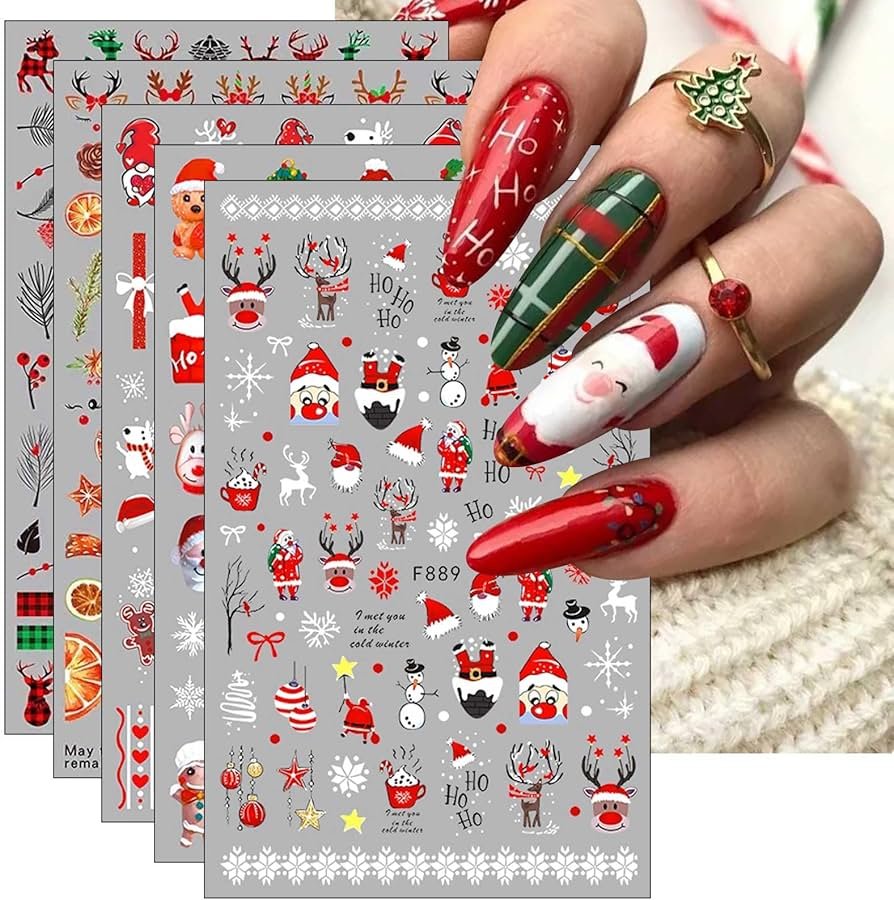
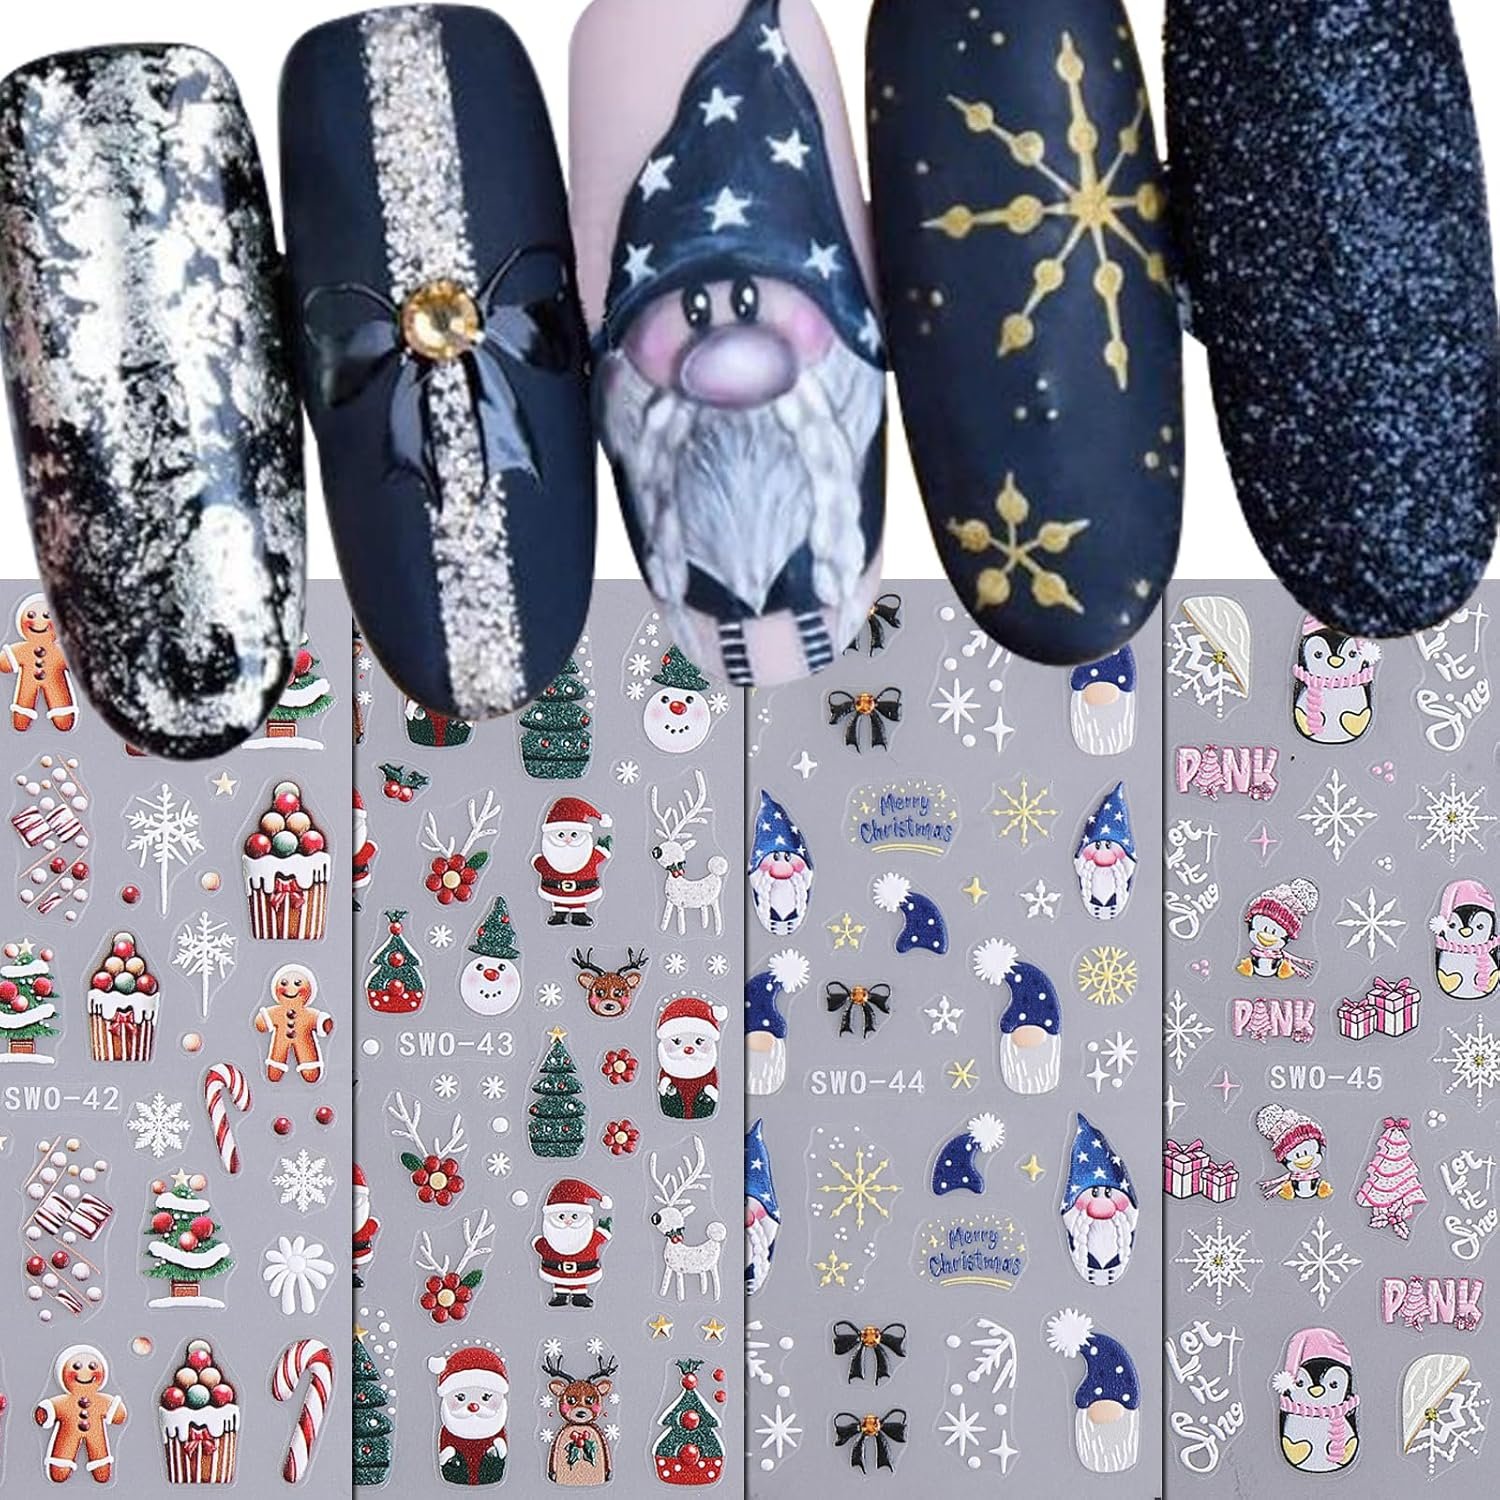
These appear to be packs of self-adhesive nail decals featuring adorable holiday motifs. The sheets include designs like cheerful Santas, reindeer with red noses, snowmen sipping hot cocoa, Christmas trees, candy canes, gnomes, and phrases like “HO HO” and “I met you in the cold winter.” The color palette is vibrant with reds, greens, whites, and golds on gray backgrounds for easy application. There’s a code “F889” visible, suggesting a specific product line. These are ideal for quick DIY manicures—peel, stick, and seal with a top coat for long-lasting festive flair.

Wieton Winter Themed Nail Gallery:
This screenshot from what seems to be the Wieton website (or a similar nail art platform) displays a collection of winter-inspired manicures under the “WINTER THEMED” category. The designs focus on subtle elegance with snowflakes, reindeer silhouettes, and geometric patterns in cool tones like blues, silvers, and whites. Some nails feature black outlines for a minimalist look, while others incorporate glitter or matte finishes. It looks like a catalog for press-on nails or gel designs, with options in various shapes (almond, square). This is perfect for those who prefer a sophisticated, snowy vibe over bold holiday icons.
Colorful Press-On Nail Sets:
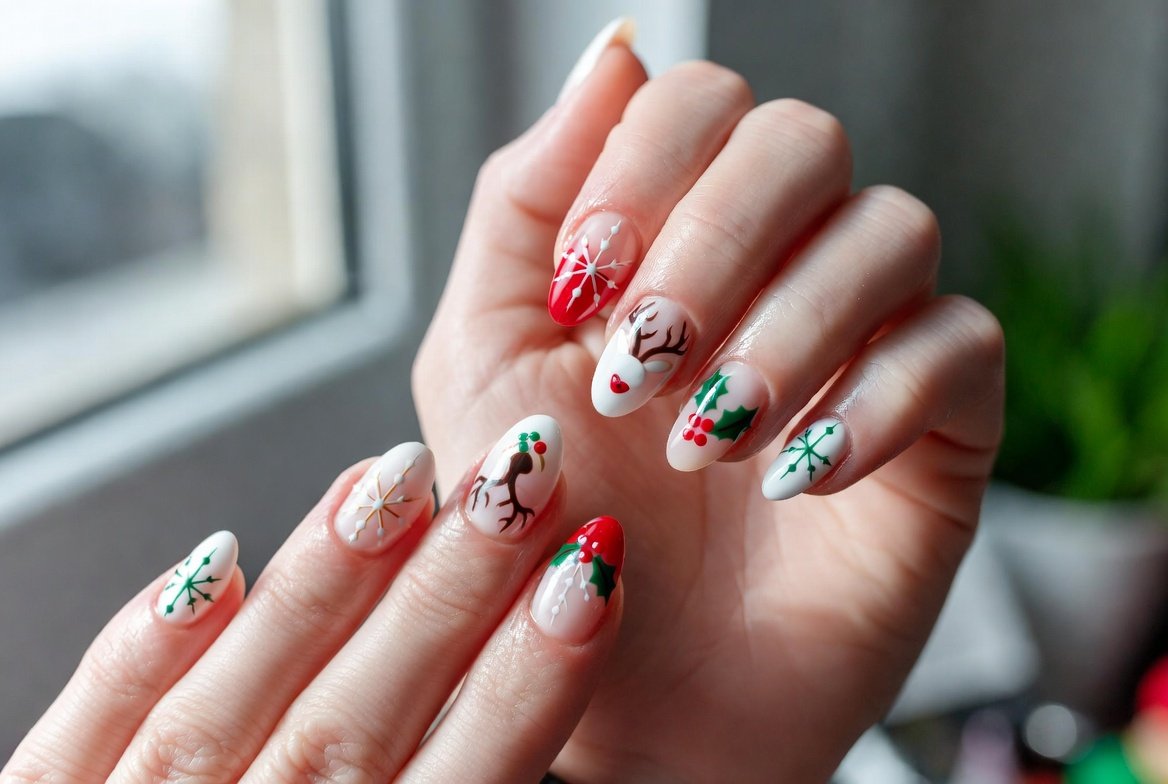
The third image shows ready-to-wear press-on nails in multiple rows, bursting with Christmas spirit. Top row: White bases with snowflakes, glitter, and tiny Christmas trees adorned with stars and gems. Middle row: Red bases with white snowflakes, reindeer, trees, and holly. Bottom row: Blue and green gradients featuring trees, snow-covered pines, reindeer silhouettes, and starry accents. These sets mix glossy finishes with 3D elements like rhinestones, making them great for instant glamour without salon visits.
These visuals highlight how versatile nail art can be—from simple stickers for beginners to elaborate press-ons for a professional touch. No matter your skill level, you’ll find something to suit your style, and once applied, you won’t need any other accessories to feel festive!
How to Remove Old Nail Polish: A Step-by-Step Guide
Before diving into new designs, start with a clean slate. Removing old polish properly prevents damage and ensures your new manicure adheres well. Here’s how:
- Gather Supplies: You’ll need acetone-based nail polish remover (or non-acetone for gentler removal), cotton balls or pads, aluminum foil (for gel or stubborn polish), a cuticle pusher or orange stick, and moisturizer.
- Soak and Wipe: Soak a cotton ball in remover and press it onto each nail for 10-15 seconds. Wipe away the polish in gentle strokes from base to tip. For regular polish, this should suffice.
- For Gel or Acrylic: Wrap soaked cotton in foil around each nail and let sit for 10-20 minutes. Gently scrape off softened polish with the orange stick—don’t force it to avoid nail damage.
- Clean Up: Wash hands with soap and water, then apply cuticle oil or hand cream to hydrate. Buff nails lightly for a smooth surface.
Pro Tip: In winter, nails can be drier due to cold weather, so always moisturize afterward to prevent brittleness.
Best Color Combinations for Winter, December, and New Year
The shared images use classic holiday hues, but mixing them thoughtfully can elevate your look. Here are tailored suggestions based on the designs, perfect for December festivities and ringing in 2026:
- Red and Green Classics: Pair bold red bases (like in the press-on sets) with green accents, such as plaid patterns or tree stickers. This combo screams Christmas and looks great with ugly sweaters or formal dresses. Add gold glitter for New Year’s sparkle.
- White and Silver Elegance: Inspired by the snowflake designs in the Wieton gallery, use white or pale blue bases with silver reindeer or snowmen stickers. Ideal for a winter wonderland vibe—pair with cozy knits or metallic outfits for December parties.
- Blue and Gold for New Year: Gradient blues from the press-ons, topped with gold stars or “HO HO” decals, transition beautifully from holiday to celebratory. This cool-warm contrast adds sophistication and pairs well with champagne toasts.
- Neutral with Pops of Color: Gray or nude bases (as in the sticker sheets) with red Santa or orange gingerbread accents keep it subtle yet fun. Great for everyday winter wear, enhancing without overwhelming.
Experiment by matching to your skin tone: Cooler undertones suit blues/silvers, while warmer ones pop with reds/golds. Always finish with a top coat for durability—these combos can last 1-2 weeks with care.
Where to Buy These Festive Nail Stickers
If you’re inspired by the F889-style stickers in the first image, you can grab similar ones online. For example, check out this 10-sheet set of Christmas nail art stickers on Amazon for a variety of patterns. Alternatively, for the exact F889 design, try this self-adhesive decal from BSI Cosmetics. For budget options, Temu offers a 2-pack with Santa and snowman motifs. These are affordable, easy to ship, and perfect for last-minute holiday. Buy now Nail Stickers
For more winter-themed inspirations like the gallery shot, explore sites like Pinterest for user-curated boards or beauty blogs for 2025 trends.pinterest.com
How to Make the Same Christmas Nail Designs (Step-by-Step)
Below is the method for BOTH styles you showed.
🎀 Pink + Purple Glitter Snowflake Nails
✅ What You Need
-
Pink gel polish
-
Purple glitter gel polish
-
White gel liner (for snowflakes + stripes)
-
Fine nail art brush
-
UV/LED nail lamp
-
Top coat (glossy)
-
Nail buffer
-
Dust brush
✨ Step-by-Step Tutorial
1. Prep the nails
-
Remove old polish
-
Shape your nails
-
Push cuticles back
-
Lightly buff the nail surface
-
Clean with alcohol
A smooth base helps the design look clean.
2. Apply the base colors
Follow the exact color placement from your picture:
-
Thumb: Purple glitter
-
Index: Purple glitter
-
Middle: Pink
-
Ring: Pink
-
Pinky: Purple glitter
Cure after each coat.
3. Add snowflakes
On the middle and ring finger:
-
Use white gel liner
-
Draw 1 big cross + 2 diagonal lines
-
Add little “branches” on each line
-
Add tiny dots around the snowflake
Cure under the lamp.
4. Make the candy-cane striped nail
If you want the same look from the example stickers:
-
On the pink base, draw diagonal white lines
-
Leave space between each line
-
Fill the gaps with purple glitter
Cure.
5. Top coat
Apply a glossy top coat to all nails.
Cure for 60–90 seconds.
🎄 3D Christmas Sticker Nails (Gingerbread, Trees, Candy Canes)
You also showed sheets of Christmas nail stickers.
This look is even easier.
⭐ What You Need:
-
Christmas nail sticker sheet (same as your photos)
-
Neutral/brown/pink base color
-
Tweezers
-
Top coat
-
UV lamp
🎁 How to Apply Stickers Correctly
1. Paint your base color
Examples:
-
Brown
-
Nude
-
Red
-
White
Cure the polish.
2. Choose your stickers
Pick:
-
Gingerbread men
-
Candy canes
-
Christmas trees
-
Snowflakes
Use tweezers for clean placement.
3. Place the stickers
-
Press them down firmly so there is no air underneath.
-
Smooth the edges.
4. Seal with 2 layers of top coat
This is important so the stickers don’t lift.
Cure for 60 seconds each time.
Gold Christmas Nails: The Ultimate Guide to Luxe Holiday Glam
Gold Christmas nails have become one of the most timeless and glamorous holiday beauty trends. Whether you love bold sparkle, subtle shimmer, or full-on glitter drama, gold nails instantly elevate any festive look — from Christmas parties to New Year’s Eve celebrations.
Why Gold Nails Are Perfect for Christmas
Gold is the universal color of celebration. It symbolizes warmth, luxury, and holiday magic. Paired with winter whites, deep greens, or classic reds, gold nails create a look that feels elegant, festive, and camera-ready for every gathering.
Popular Gold Christmas Nail Ideas


Here are some of the trendiest ways to wear gold nails this season:
1. Gold Glitter Tips
A modern twist on the French manicure, gold glitter tips add a soft sparkle without overpowering the nail. Perfect for minimalists.
2. Metallic Gold Chrome
Ultra-shiny and reflective, chrome nails offer a futuristic holiday vibe. They look stunning in both long and short shapes.
3. Gold Snowflake Accents
For a more festive touch, pair a nude or white base with delicate gold snowflake designs.
4. Gold Foil Nails
Gold foil creates a textured, artistic look that pairs beautifully with deep green or burgundy bases.
5. Full Gold Glitter Glam
For those who love bold sparkle, full gold glitter nails shine brightest at Christmas parties and New Year’s Eve events.
Best Color Pairings for Gold Christmas Nails
Gold is incredibly versatile. Pair it with:
-
Red for a classic Christmas look
-
White for a frosty winter aesthetic
-
Emerald green for rich luxury
-
Black for a chic New Year’s vibe
-
Champagne tones for soft elegance
How to Make Gold Nails Last Longer
To keep your gold manicure looking flawless:
-
Apply a strong base coat
-
Use high-quality glitter or chrome products
-
Seal with two layers of top coat
-
Avoid harsh cleaning products
-
Moisturize cuticles daily
In summary, these nail designs encapsulate the joy of the season—playful, colorful, and adaptable. Whether sticking on decals for a quick update or opting for press-ons for effortless style, you’ll be set for winter’s best moments. Happy New Year, may 2026 bring even more sparkle to your fingertips! 🎉